


Complete Object Rental Management
Learn how to manage the inventory of lockers and rental objects with annual invoicing
This tutorial guides you through all the steps of managing object rental (lockers, cabinets) within your club. You'll learn how to create inventory lists, assign objects to members, and manage annual invoicing.
Create an invoicing item
Before managing object rental, you must first create the corresponding invoicing item in the software settings.
- Go to SETTINGS in the main menu
- Select MANAGE INVOICING
- Click the Add an item
- Fill in the fields:
- Name: for example “Locker rental”
- Price for juniors (optional)
- Price for adults
- Save the item
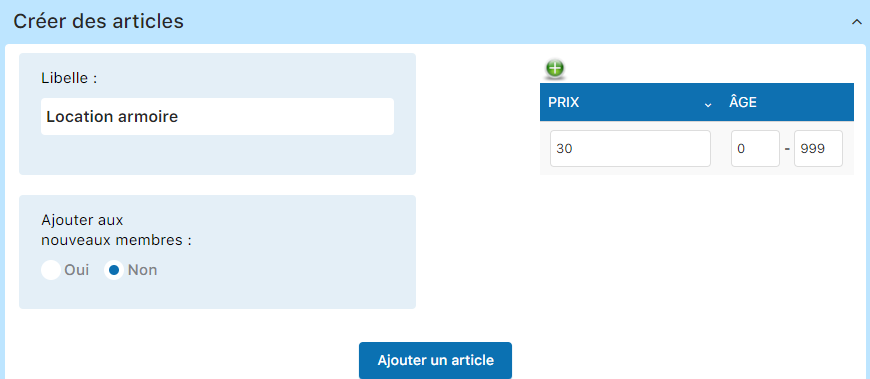
Tip: You can create several items with different prices for juniors and adults. This allows flexible management based on your club's rates.
Create an object list (inventory)
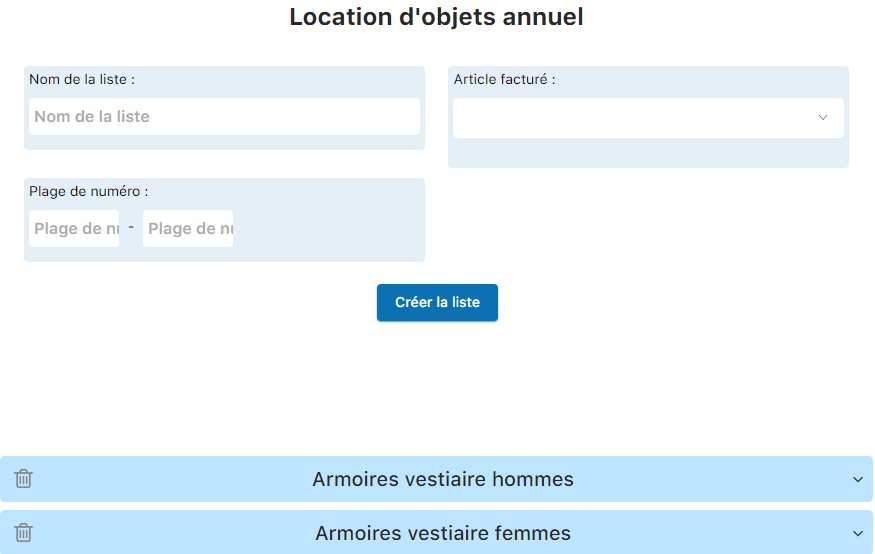
Create an inventory list to manage your club's lockers or rental objects.
- Go to INVOICE in the menu
- Click OBJECT RENTAL
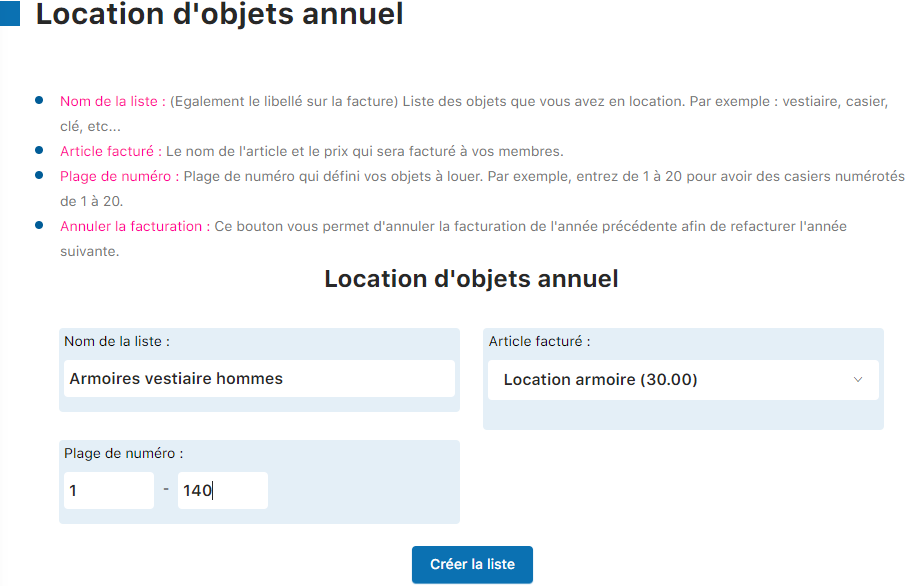
- Fill in the creation fields:
- List name (e.g. “Men's lockers”)
- Invoicing item (select the one created in step 1)
- Click Create the list
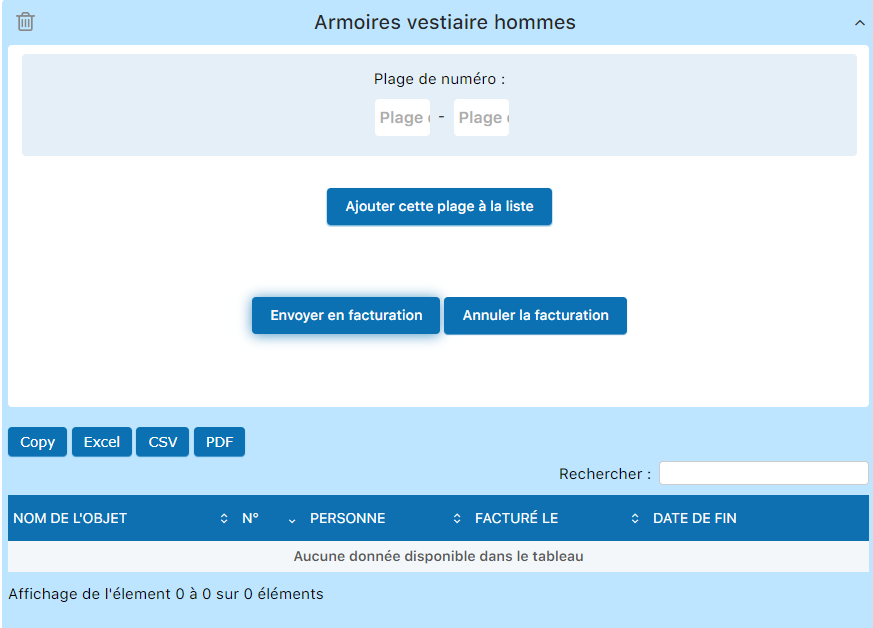
Add object ranges
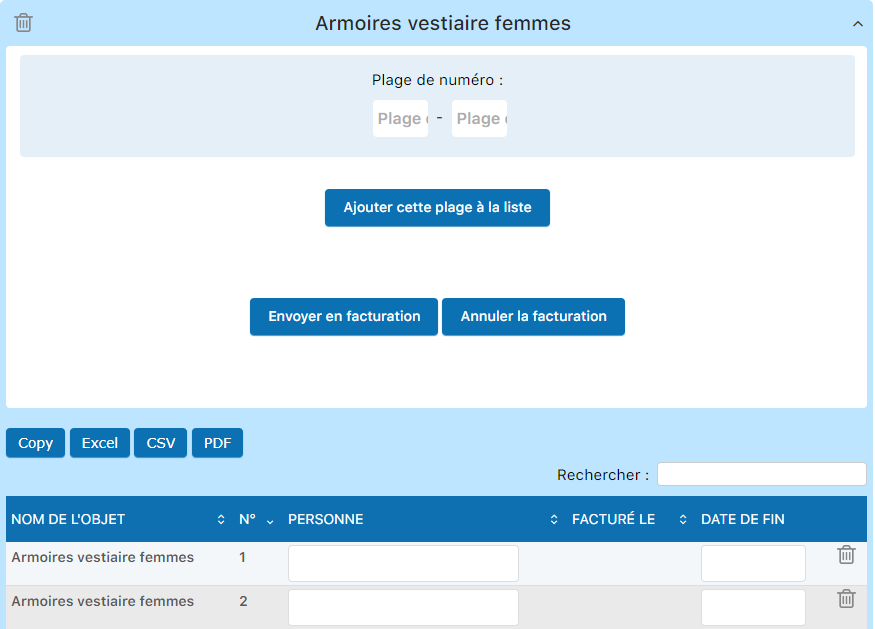
- In the range field, enter a range of numbers (e.g. 1 to 140)
- Click Add this range to the list
- The objects are created in the inventory
Assign members to objects
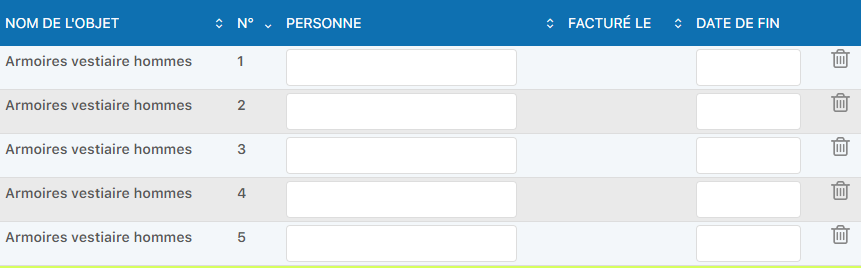
- For each object, click in the field Person
- Start typing the first letters of the member's name
- Select the member from the drop-down list
- Repeat for all rented objects
Create other lists
If you have several rental areas (women's, men's, juniors' lockers, etc.), create a separate list for each area.
Delete an object from the list
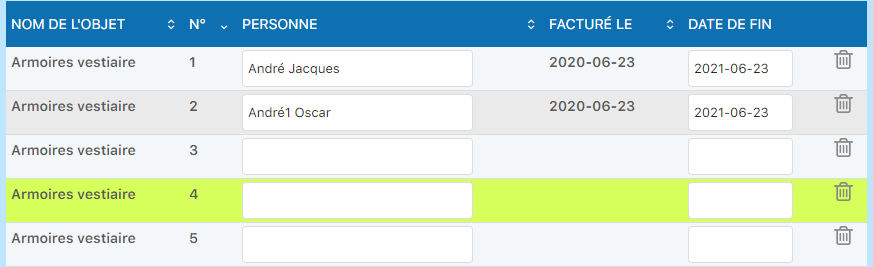
If an object is no longer available or needs to be removed from the inventory, you can delete it individually.
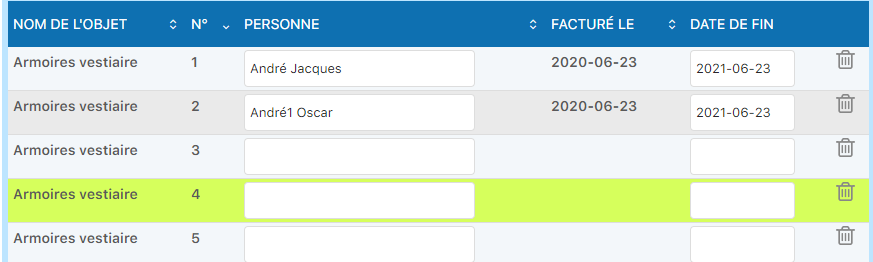
- Display the object list
- Locate the object to delete (e.g. locker No. 4)
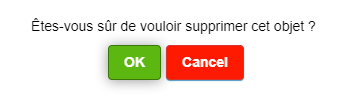
- Click the trash icon
- Confirm by clicking OK
Insert a new object
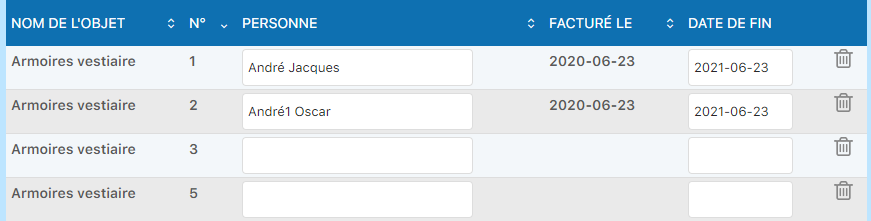
To add an object that was deleted by mistake, or to extend your inventory, you can insert a new range of objects.
- Display the object list
- In the range field, enter the range to add (e.g. 4 to 4 for a single object)
- Click Add this range
- The new object is created and can be assigned to a member

Delete an entire list
To delete a complete object list, go to the list headers view.
- Display the list headers
- Locate the list to delete
- Click the trash icon
- Confirm the deletion

Warning: A list cannot be deleted if it contains associated invoices. You must first cancel the invoicing before you can delete the list.
Invoice rental objects
Once your objects are assigned to members, generate the invoices for the current year.
- Display the object list
- Click the Send to invoicing
- The items are added to the current invoicing
- Each member with an assigned object receives a line on their invoice
Tip: You can view the invoices directly from the INVOICE menu to check that the rentals are correctly included.
Re-invoice for the following year
To invoice the rentals again the following year, you must first cancel the previous invoicing, then relaunch it.
Steps for re-invoicing
- Display the object list
- Click Cancel invoicing
- Wait for the status to update
- Clear the assignments:
- Clear the member's name from the Person field
- Enter the member's name again
- Click Send to invoicing
- Refresh the invoices page


Important: Invoicing is reserved for a one-year period (e.g. June 2020 to June 2021). If you try to invoice again without cancelling, the system will block the action. Follow the cancellation and re-invoicing process described above.
Export the object list
You can export the object list in Excel format to print or archive it.
- Display the object list
- Click the Excel
- A file is created and downloaded to your Downloads folder
- Open the file with a spreadsheet application to view or print the list

Tip: The Excel export is especially useful for annual reports or for archiving your inventory at a given date.
Alternative: Use member groups
If you have few lockers or rental objects, a simplified alternative is available.
Alternative approach: Instead of using full object list management, you can create member groups and link them to an invoicing item. This approach is simpler but has one limitation: the locker numbers will not appear on members' invoices. Use this method only if you have a limited number of objects to manage and the individual numbers aren't important.
Summary of the main steps
- Step 1: Create an invoicing item in SETTINGS / MANAGE INVOICING
- Step 2: Create an object list in INVOICE / OBJECT RENTAL
- Step 3: Add object ranges and assign members
- Step 4: Send the list for invoicing
- Step 5: For the following year, cancel and relaunch invoicing
- Step 6: Export the list to Excel if needed
Plugin.ch Tutorial — Manage object rental